Installation in Woocommerce

Note

The Naiz Fit SizeForm plugin for Woocommerce is currently being developed. For the time being, we therefore recommend that you follow these instructions to integrate Naiz Fit SizeForm into sites with Woocommerce.

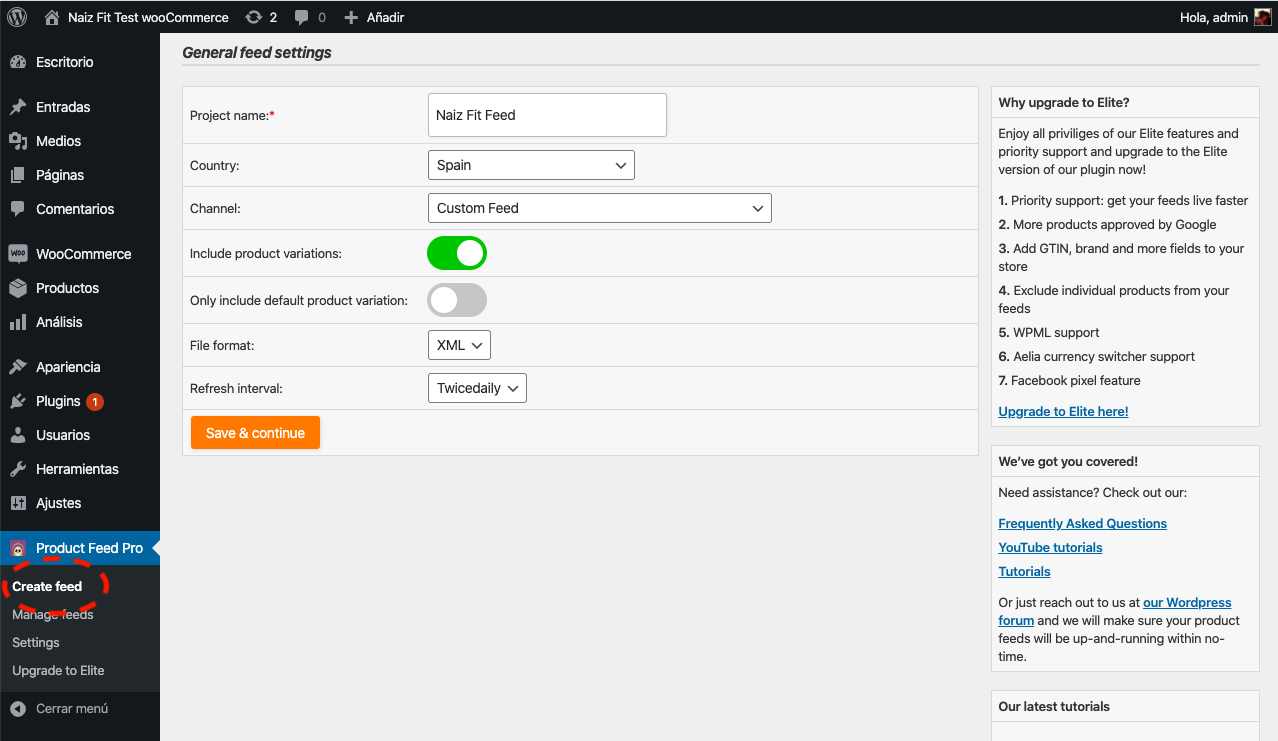
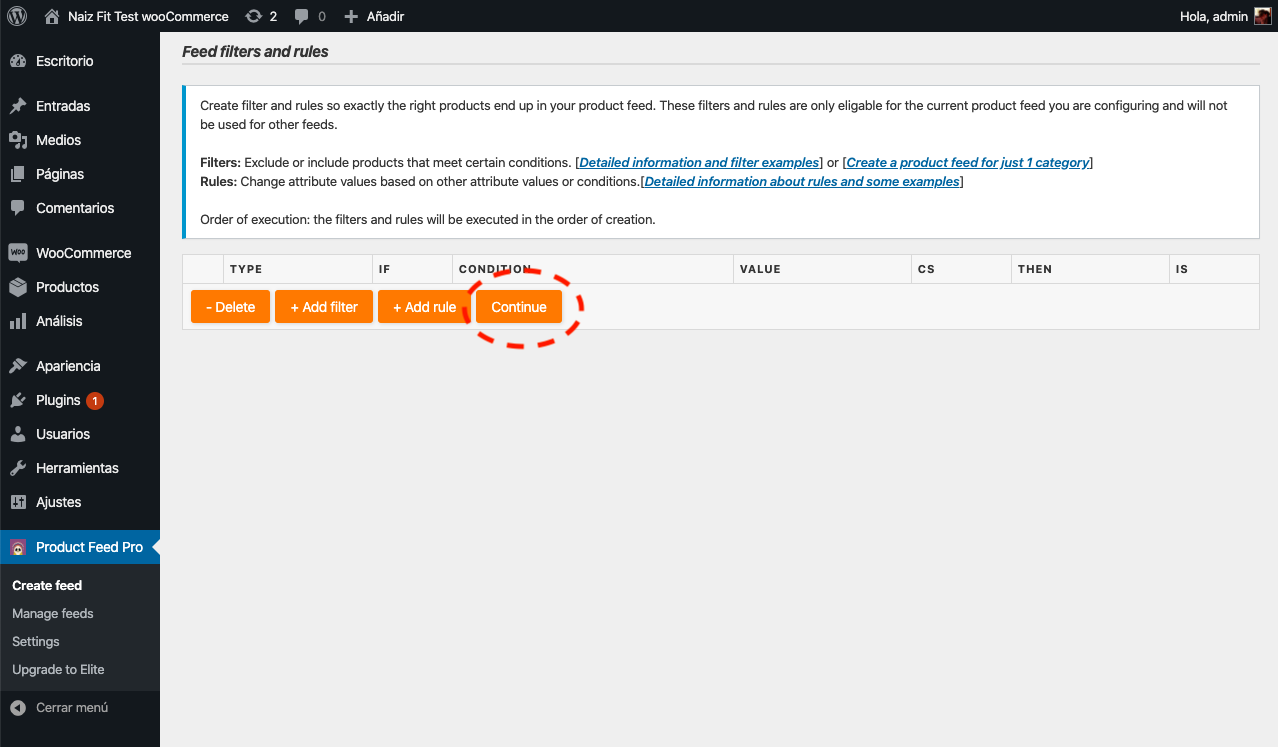
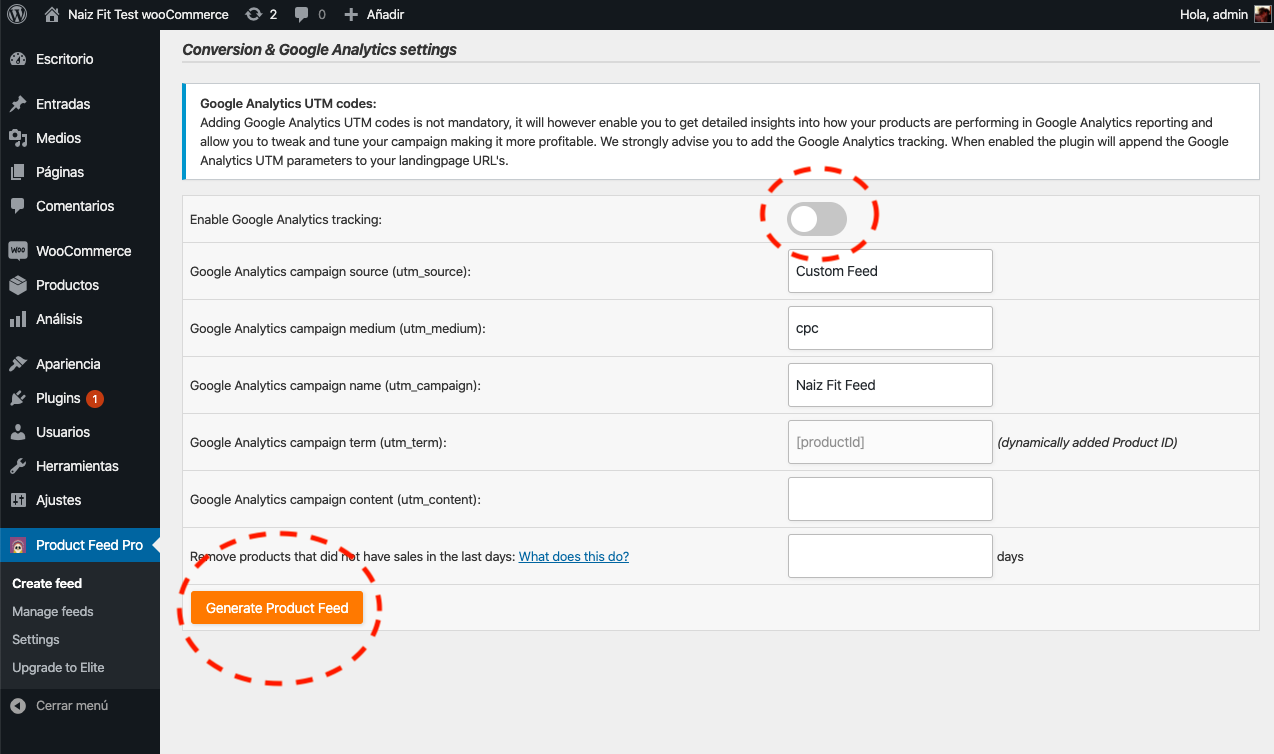
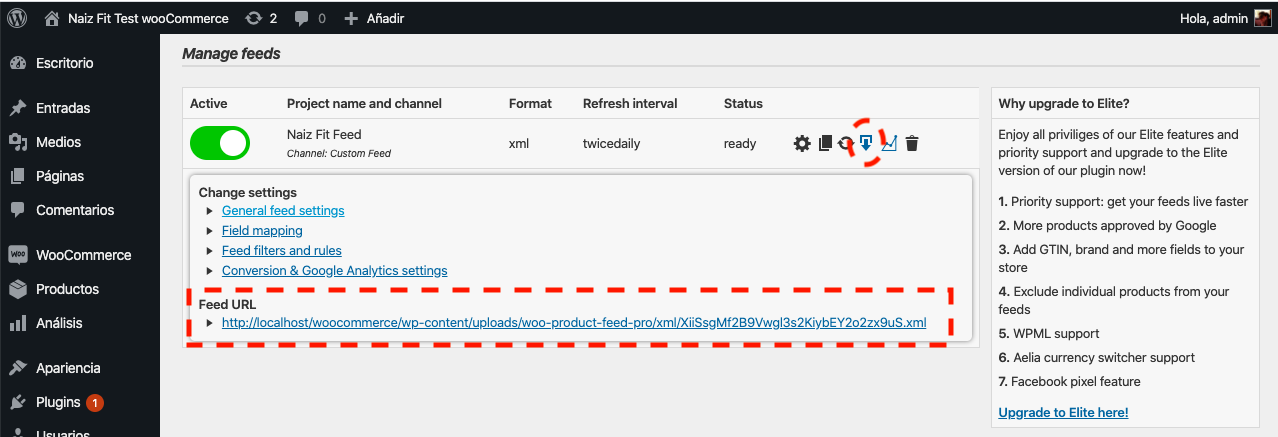
To instal Naiz Fit SizeForm in Woocommerce, you need to insert the HTML snippet from your welcome email into your theme template in Woocommerce – or complete this process using Google Tag Manager – and configure the webhook directly in Woocommerce settings. We have also included instructions on how to use a third party plugin to generate a product feed which is compatible with Naiz Fit SizeForm.

You should have received two key pieces of information in your welcome email to the Naiz Fit Family:

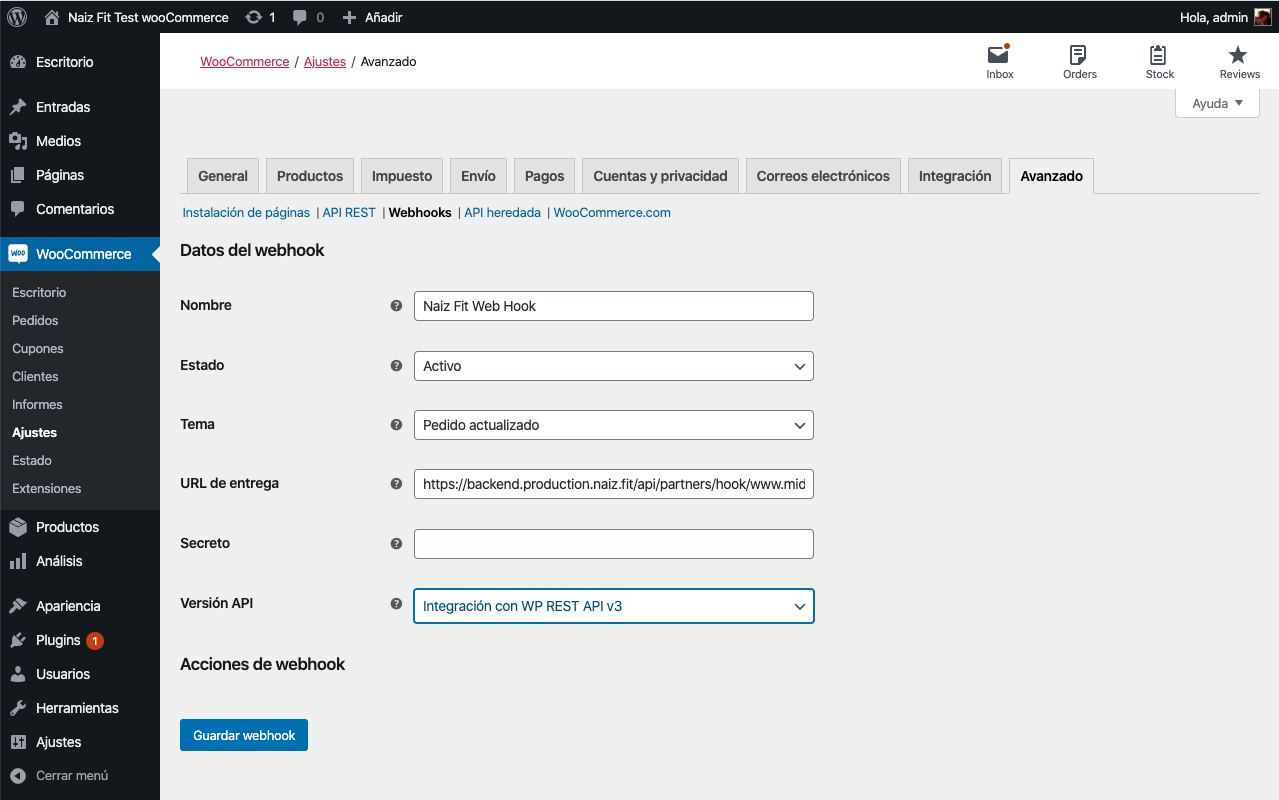
  • The Partner Hash for your online shop. This hash authenticates your online shop with the Naiz Fit SizeForm platform. You’ll need it when installing the various plugins.
  • The HTML snippet for inserting the widget into your HTML template or as a tag in Google Tag Manager if your system does not have a plugin provided by Naiz Fit.

Inserting the HTML snippet

Note

If your online shop is already integrated with Google Tag Manager, we recommend that you instal the widget using the Google Tag Manager installation method. When you have completed the installation using this method, continue working through the sections in this document on the Webhook and the Feed.

To instal the Naiz Fit SizeForm widget, we have to modify the footer template for the current theme in Wordpress for our online shop.

We do this as follows:

  • In the Wordpress admin panel, go to Appearance > Themes.

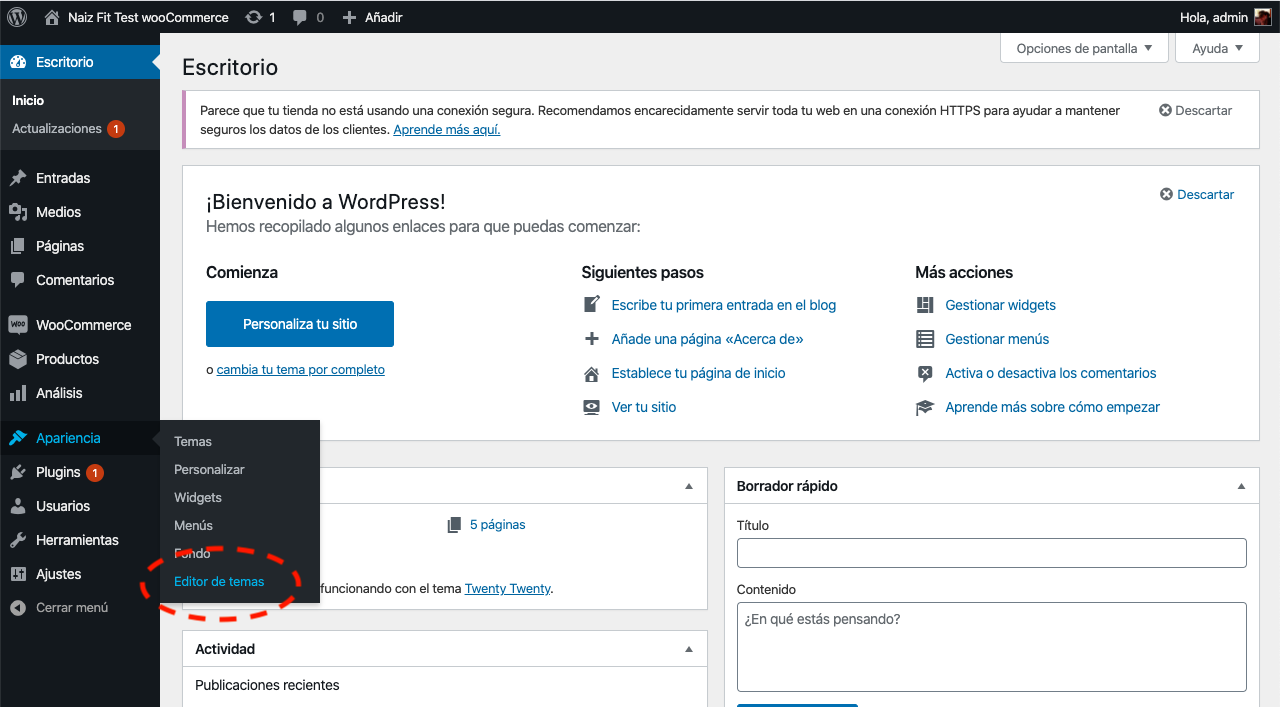
  • This will open the Wordpress theme editor. Select Theme Footer from the options on the right and paste the content of the HTML snippet just before the angle bracket for the \ tag, as shown in the image.

Warning

Bear in mind that you’ll have to carry out this action if you change the theme of your website in the future.

  • After you have pasted the text corresponding to the HTML snippet, click Update File.

Configuring the webhook

Woocommerce has a specific functionality for sending webhooks to third party systems. Follow these steps to configure the webhook for sending order information to Naiz Fit SizeForm:

  • Go to Woocommerce > Settings.

  • Choose Advanced > Webhooks.

  • If there are no other webhooks configured, select Create a new webhook. Otherwise, click Add webhook.

  • Complete the form with the following information:
  • Name: You can assign any value, e.g. ‘Naiz Fit Webhook’. This will help you to identify that this is the webhook you have configured.
  • Status: Set to Active.
  • Topic: Select Order Updated.
  • Delivery URL: enter https://backend.production.naiz.fit/api/partners/hook/DOMAIN/HASH, changing DOMAIN to the complete domain of your website (www.example.com) and HASH to the Partner Hash for your online shop.
  • API version: Select Integration with REST API v3
  • Click Save Webhook

Once you’ve saved the webhook settings, it will be active in the list of webhooks.

Configuring the product feed

Woocommerce does not include a system for generating product feeds. To create it, we have to use a third party method.

At Naiz Fit, we recommend the free plugin called Product Feed Pro for WooCommerce.

Instal the plugin and then follow these instructions:

  • Go to Product Feed Pro > Create feed.
  • Complete the form with the following data:
  • Project name: You can assign any value, e.g. ‘Naiz Fit Feed’. This will help you to identify that this is the feed you have configured.
  • Country: Assign the country of your online shop. In the example, this would be ‘Spain’.
  • Include product variations: Check this box. *Do this before selecting the Channel field given that changing this value sometimes resets the value of the Channel field.
  • Channel: Select Custom Feed.
  • Only include default product variation: Uncheck this box.
  • File Format: Select XML.
  • Refresh Interval: Select Twicedaily.

Warning

Before you save and continue, check that the information in the form is correct.

  • Click Save \& Continue.

  • We now need to remove unnecessary fields by selecting them from the list and clicking Delete. The Brand and Price fields appear by default and should be deleted since they're not necessary for configuring Naiz Fit SizeForm.
  • Click Add field mapping to add an empty line to the list of fields. On the left, go to Detailed product description > Size. In the field on the right, search for the name of the attribute corresponding to the field that stores the product size variants. In our case, it's called Size. It can detect the variants that you’ve configured in your online shop, because these have the added text ‘Dynamic Attribute’.
  • Click Add custom field to add an empty line to the list of fields. On the left, Insert the text SKU. In the field on the right, search for the name of the attribute corresponding to the field that stores the product SKU. In our case, it's called SKU.
  • Click Save once your list contains at least the following fields: Product ID (id), Product title (title), Product URL (link), Main Image URL (image_link), Categories (categories) and Size (size).

  • Click Continue on the next screen without changing or adding any additional values.

  • Deactivate the Enable Google Analytics Tracking checkbox.
  • Complete the process by clicking Generate Product Feed.

  • The system should take you back to the section called *Manage Feeds, where your newly created feed will appear.
  • Click on the fourth icon (rectangle with an arrow pointing down) to open the feed details.
  • The product feed URL that you should send to the Naiz Fit SizeForm experts is the one marked in a box in the following image.